"Sorry, but I'm a genius magician ^_~" -Yamuraiha

Hi everyone! It's time to show you guys a sort of tutorial on the staff I made for my Yamuraiha cosplay. This was the first staff I have ever made and the biggest prop I've ever made. I messed up a lot on it, but that only means I learned a lot from making those mistakes. I am here to give you guys some tips on how to go about making a prop like this. You might see that my staff does not break down into two parts (because I messed up on that part) so it makes transportation a little difficult. I am planning on remaking this staff at some point, so I will have a better tutorial for a two piece staff later on. Because this staff has such an organic shape, it is a rather easy beginner project. Anyway, to the tutorial!!
Materials Used
- Reference pictures
- Large piece(s) of cardboard or poster board
- Writing utensil
- Box cutter
- 2 8" Styrofoam half orbs (they are sold by halves)
- Wooden dowel/stick/PVC pipe (for support)
- 2 cans of expandable foam
- Carving knife
- 1-2 rolls of masking tape
- Newspaper
- Paper Mache glue (I make this out of water, Elmer's glue, and cornstarch)
- Fast Mache (or plaster)
- Sandpaper
- 1-2 bottles of woodglue
- 1 can of pink spray paint
- Sealing spray
Tutorial

2. Draw out a small prototype of what you want; this is to estimate what size each part of the staff will be. This will hopefully prevent making any sizing mistakes once you get to the real thing.

3. Draw out the shape of the staff on cardboard or thick poster paper and cut it out with a box cutter, and leave an 8" circumference space in the middle for the orb. This is going to serve as the base for your staff so make sure you draw out the exact shape you want your staff to have. Since the staff is quite big, you might have to use 1-3 separate pieces of cardboard and then tape any parts together. If you are going for a staff that separates into multiple pieces for easy storage, now is the time to decide where you want the pieces to break off.

4. Glue the half orbs on the cardboard base. I just used hot glue to keep them in place since the expandable foam we will be using is actually going to do a better job at keeping the orb in place.
5. Because this is a staff, you will need to add support to it. You can use a wooden dowel (which is what I used) or PVC pipe. I used a wooden dowel on the bottom part of the staff, but to be honest I should have added smaller pieces on the curves and on the base of the top part of the staff. My staff is okay, but the curves lack support so a part of it started to crack. Make sure you add plenty of support for the best outcome! All you have to do is tape or glue the dowel/PVC pipe to onto one side of the cardboard base. It is such an easy, yet vital step to making this staff.
6. Put the staff cutout on some plastic and start spraying expandable foam on it. Because this staff has two sides, you will have to spray one side of the staff, wait for the foam to expand (at last 2 hours) and then turn it over and spray the other side. Let the foam expand and dry overnight before you start carving into it.


7. Take a carving knife, and start carving out the shape of the staff into the foam. Use the cardboard base as a guide, but try to guide the staff a fuller 3D shape (sine the cardboard base is flat and 2D). If you mess up or cut too much, you can always add more expandable foam to it.
8. Once you are content with the shape of the staff, mask tape the whole thing! Yep, you have to tape the entire thing!!! Well...the only thing I did not tape was the orb. I left that as is for now. You can use just 1 layer of tape. This will take a bit of time to do. Here is the top part of the staff all taped out.

9. Paper Mache the entire staff, except for the orb. Start laying newspaper and glue on this. The paper mache will give this prop more weight and also make it stronger. That way, it won't break easily. I only did 1 layer of paper mache.

10. Fast Mache or Plaster the entire staff. To avoid doing too much sanding and getting a smooth finish, use either Fast Mache or plaster over the paper mache. I used Fast Mache because I already had some (although I think it would have been better to use plaster). Fast Mache is basically paper ground up into powder, which you add water to to make a thick paste. Then you just smooth paste over the surface. Fast Mache will dry to be insanely rough, but it gives you an even surface. You will have to sand this, but let it dry for at least 24 hours first.

12. After you sand the Fast Mache, it is time to prime!! I personally prefer to prime with Woodglue because it gives a very smooth finish and you don't have to sand it (unlike Gesso). I used about 3 layers of woodglue. Since we did not Paper Mache or Fast Mache the orb, make sure to add woodglue to give the Styrofoam orb a smooth surface.
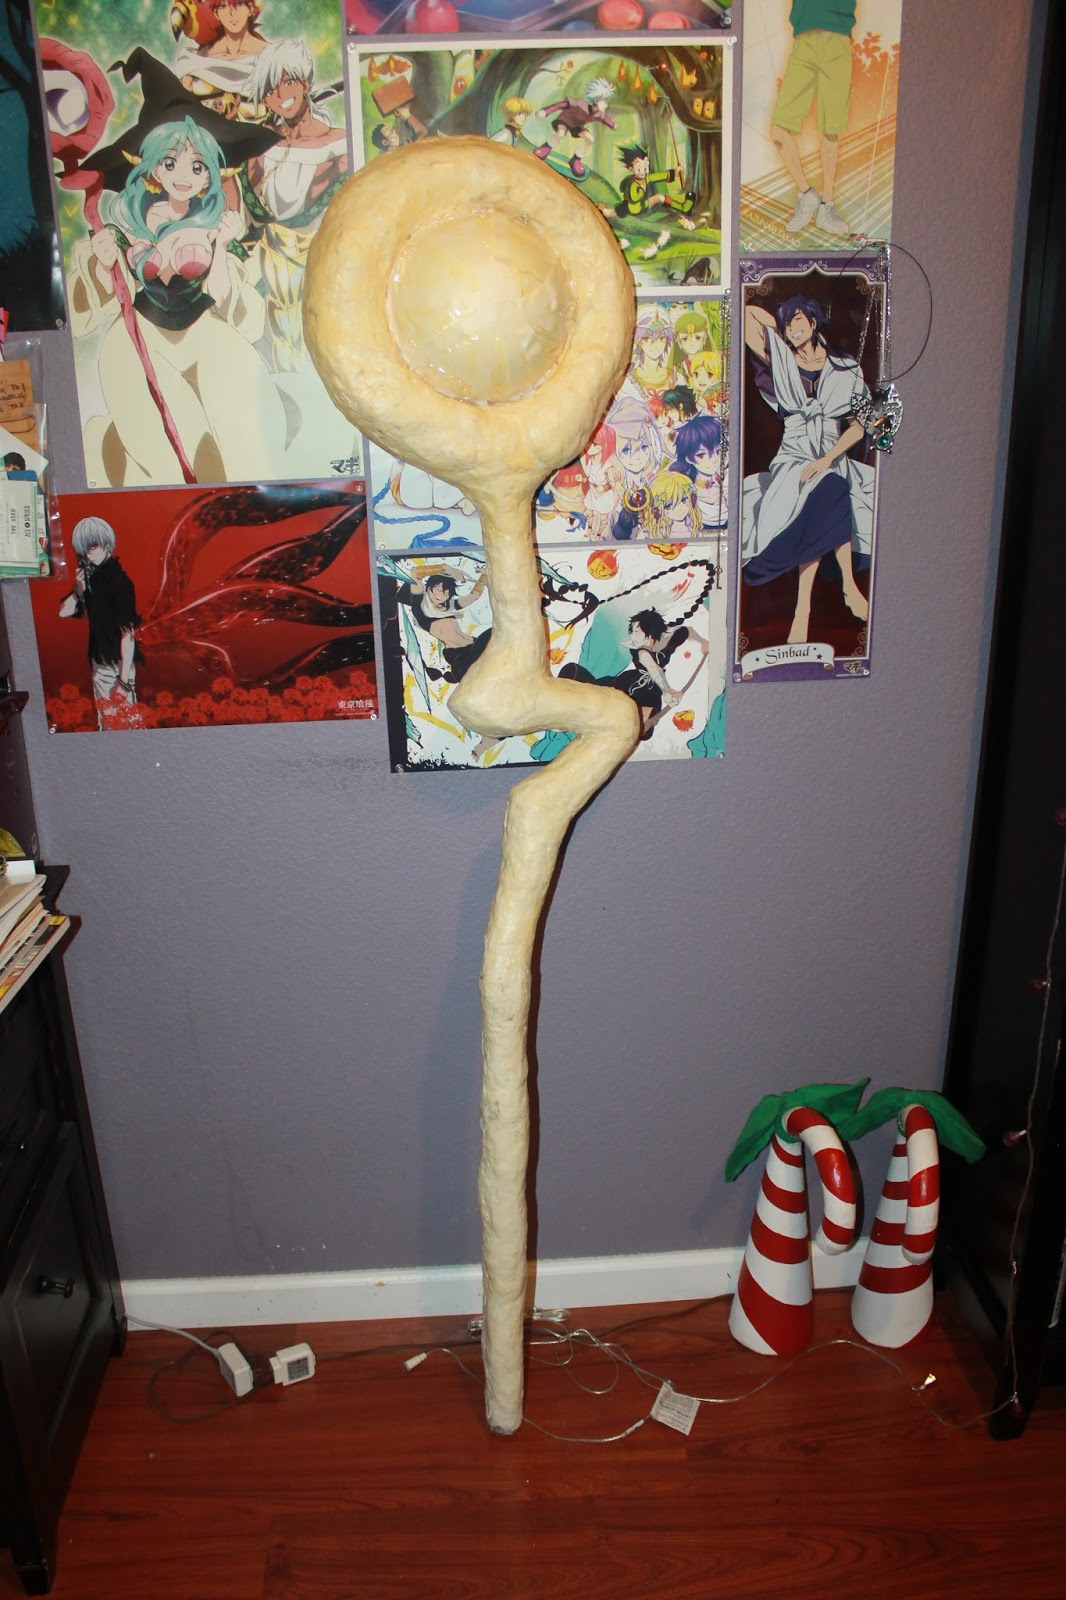
13. Paint time! After you've primed, you can finally paint. I rushed to finish this for SacAnime, so I just spray painted it with a coral pink color. We don't want the orb to be pink, so I covered it with plastic wrap and tape. Once I finished spray painting, I used a pearly white acrylic to paint the orb. Seal everything with an acrylic sealing spray.

And you're done!! Enjoy your new staff :D

See you next time ^_^


No comments:
Post a Comment